Bridge Components
Let’s move forward in transforming the application to make it more native. An effective approach is to use Bridge Components (formerly known as Strada Components), which create an integration between the web application and iOS, enabling the addition of native elements.
First Bridge Component
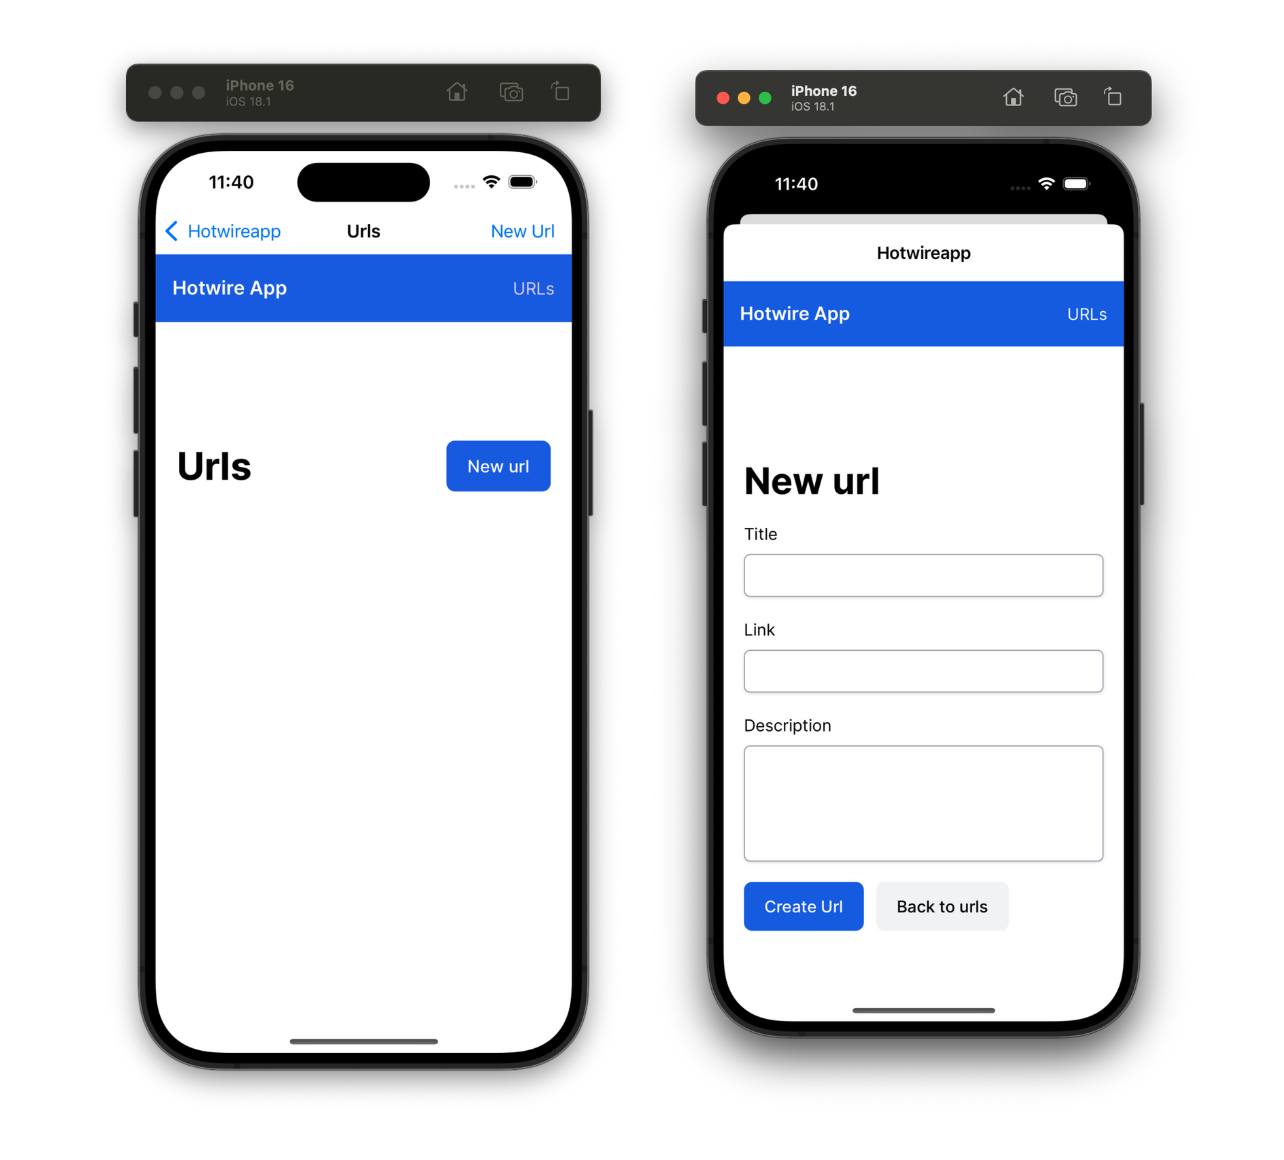
In the previous chapter, we identified the New URL button on the URLs screen. We’ll replace it with a native button, removing it from the web interface to provide a more integrated and native look.
Step-by-step guide to creating the New URL button in its native version using a Bridge Component:Create the Bridge Component in iOS:
Develop a component in the iOS project to receive instructions sent by Rails.
Create the Stimulus Controller: Configure a Stimulus Controller that, upon triggering the connect event, sends the necessary information to render the native element.
Set Up the Markup: Update the HTML on the page where the component will be displayed, linking it to the Stimulus Controller.
iOS Bridge Button Component
In the iOS project, right-click on the file tree and select New Empty File, or use the shortcut Command + N. Create a Swift file named ButtonComponent. The following code includes comments to assist understanding, especially for those new to Swift.
import HotwireNative
import UIKit

final class ButtonComponent: BridgeComponent {

  // Assigns a name to the component, allowing it to connect
  // to the Stimulus Controller using this string.
  override class var name: String { "button" }

  // During the Stimulus `connect` event, the component
  // receives necessary information, such as the button title.
  override func onReceive(message: Message) {

      // Use print(message) to inspect the data received from Rails.
      // The content will be displayed in the Xcode logs.
      guard let viewController else { return }
      addButton(via: message, to: viewController)
  }

  private var viewController: UIViewController? {
    delegate.destination as? UIViewController
}

  // Function responsible for setting up and rendering the native button
  // on the iOS app screen, adding it to the right side of the Navbar
  // in response to the `connect` event from the Stimulus Controller.
  private func addButton(via message: Message, to viewController: UIViewController) {

    guard let data: MessageData = message.data() else { return }

    let action = UIAction { [unowned self] _ in
      self.reply(to: "connect")
    }

    let item = UIBarButtonItem(title: data.title, primaryAction: action)
    viewController.navigationItem.rightBarButtonItem = item
  }
}

// Decodes the message received from the Stimulus Controller
// into the `MessageData` struct. Classes, structs, and extensions
// were discussed in the Swift section.
private extension ButtonComponent {
  struct MessageData: Decodable {
    let title: String
  }
}
Register the component in Hotwire Native to make it available in the project and accessible as needed. In the AppDelegate file, add the following code below the PathConfiguration setup:
Hotwire.registerBridgeComponents([
  ButtonComponent.self
])
Connecting Rails to the Native Component
Ensure that the necessary packages are installed in your Rails project:
./bin/importmap pin @hotwired/stimulus @hotwired/hotwire-native-bridge
To complete the integration and enable Rails to call the native component, create a new Stimulus Controller at the specified path and name:
app/javascript/controllers/button_controller.js
Stimulus Controller Implementation in Rails
import { BridgeComponent } from "@hotwired/hotwire-native-bridge"

export default class extends BridgeComponent {
  // Remember the string in the Swift component?
  static component = "button"

  // The `connect` method is executed when the element is ready,
  // informing the bridge about the component being called and
  // defining the native button's action via a callback.
  connect() {
    super.connect()

    const element = this.bridgeElement
    const title = element.bridgeAttribute("title")
    this.send("connect", {title}, () => {
      this.element.click()
    })
  }
}
Connecting the New URL Button to the Stimulus Controller
To complete the process, the connect method of the Stimulus Controller needs to be triggered. This is achieved through an HTML element. Update the New URL button in the file:
app/views/urls/index.html.erb
In the link_to helper, add the required data attributes to activate the Stimulus Controller, including the controller name and the button title:
<%= link_to "Back to urls", urls_path, class: "ml-2 rounded-lg py-3 px-5 bg-gray-100 inline-block font-medium",
data: { controller: "button", bridge_title: "New Url" } %>
After the update, run the iOS app again (Command + R). Navigate to URLs and observe that the native button appears as implemented.
When clicked, it performs the same action as the web button. This works because the Stimulus Controller, via the callback in the connect method and the this.send call, ensures that the event triggered by the native button click is equivalent to clicking the web button (this.element.click()).
Recap
To understand Bridge Components, it is essential to consider three main elements:
Swift Component: Native code responsible for implementing functionality on iOS (or Android).
Stimulus Controller: JavaScript code that connects to an HTML element, sends messages to the native bridge to execute or display functionalities, transmits the data needed to render the native element, and defines the callback.
HTML Markup (ERB): HTML structure that invokes the Stimulus Controller, passing the necessary data-bridge attributes for the native component to function.
These steps, in a simplified manner, represent the integration flow using the native bridge.
